Creating a tidy and organized living space can enhance both the look and feel of your home. Whether you live in a small apartment or a larger house, implementing easy DIY home organization projects can help reduce clutter and make everyday living more enjoyable. Best of all, many of these projects use affordable materials and simple techniques that anyone can follow. This guide will walk you through several practical ideas to refresh your living space with minimal time and effort.
Why Organize Your Living Space?
Organizing your home goes beyond aesthetics. A well-organized space can:
– Reduce stress by eliminating clutter
– Save time by making it easier to find belongings
– Maximize use of available space
– Create a calmer, more inviting atmosphere
With these benefits in mind, let’s explore some DIY organization projects that fit a range of rooms and needs.
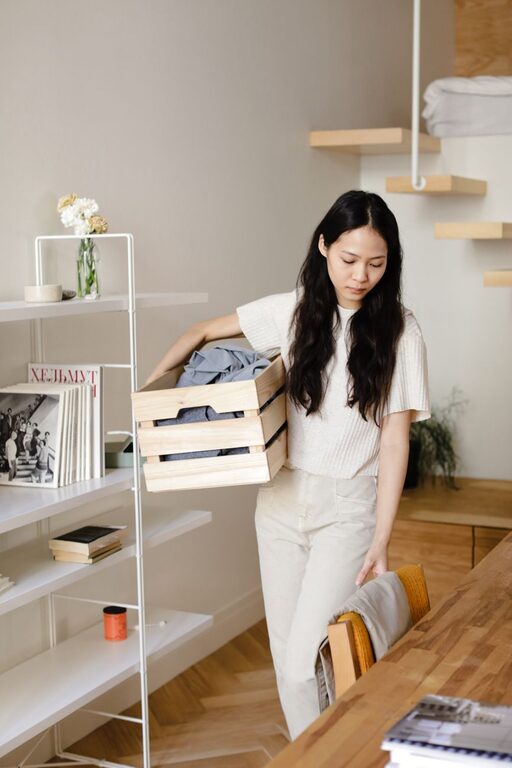
1. Create Custom Storage with Wooden Crates
Wooden crates are versatile and affordable. They can be stacked or mounted on walls to hold books, toys, shoes, or kitchen items.
Materials Needed
– Wooden crates (available at most craft or home improvement stores)
– Sandpaper
– Paint or stain (optional)
– Screws and anchors (for wall mounting)
– Felt pads (to protect floors)
Steps
- Sand the crates to smooth rough edges.
- Paint or stain crates to match your décor, or leave natural for a rustic look.
- For floor use, stack crates and secure with screws for stability.
- To mount on walls, mark desired location, drill holes, and use screws and anchors to secure crates horizontally or vertically.
- Add liners or baskets inside crates to keep small items organized.
This project is adaptable to any room—kitchen spices, kid’s toys, bathroom towels, or office supplies.
2. Use Tension Rods to Maximize Cabinet Space
Tension rods can cleverly organize items inside cabinets or closets without permanent installation.
Ideas for Use
– Hang spray bottles in kitchen or bathroom under cabinets.
– Create a shelf divider by placing a rod horizontally to separate pans or lids.
– Use vertically for hanging scarves or belts in closets.
Simply measure the space, cut the tension rod to size (if adjustable), and place where desired. This solution is inexpensive and requires no drilling.
3. Repurpose Jars and Containers for Small Item Storage
Glass jars and small containers work great for organizing things like office supplies, craft items, or pantry staples.
How to Get Started
– Collect jars from kitchen or buy decorative mason jars.
– Clean and remove labels.
– Use matching lids or paint lids for a cohesive look.
– Label jars with chalkboard stickers or printed tags.
– Arrange jars on shelves, inside drawers, or atop desks.
This method keeps frequently used items visible and accessible while maintaining tidiness.
4. Install Floating Shelves for Extra Storage and Display
Floating shelves add surface area without taking up floor space and can be both functional and decorative.
Installation Tips
– Choose sturdy brackets and shelves that can hold the intended weight.
– Use a stud finder to locate wall studs for secure installation.
– Follow package instructions carefully for leveling and mounting.
– Style shelves with books, plants, baskets, or framed photos to personalize the space.
Floating shelves are perfect for living rooms, bathrooms, or home offices and can be arranged in creative patterns.
5. Make a Charging Station for Electronics
Corral cords and devices in one place with a DIY charging station to avoid cluttered countertops.
What You Need
– A small box or basket
– Power strip
– Drill (to make holes in the box for cords)
– Cable clips or ties
Steps
- Drill holes in the box for power cords to pass through.
- Place the power strip inside the box.
- Position the box on a desk or countertop near outlets.
- Use cable clips to organize cords outside the box.
- Store phones, tablets, and chargers neatly inside.
This keeps electronics charging cords tidy and off furniture surfaces.
6. Create Drawer Dividers with Foam Board or Cardboard
Dividers help keep drawers neat by separating items like utensils, clothing accessories, or office supplies.
How to Make Dividers
– Measure drawer dimensions.
– Cut foam board or cardboard strips to fit drawer width or length.
– Arrange dividers inside drawer to create compartments.
– Use double-sided tape to keep dividers in place (optional).
You can customize the size of compartments according to what you store—this is especially useful in kitchen or dresser drawers.
Tips for Maintaining Your Organized Space
– Set aside 10–15 minutes daily to tidy up.
– Donate or discard items you no longer need.
– Use labels to ensure items return to their proper place.
– Review your organization solutions regularly and adjust as needed.
By investing a little time into these simple DIY projects, you can transform your living area into a more organized, efficient, and beautiful environment. The best part is that you don’t need special tools or skills to get started—just creativity and a willingness to declutter!
—
Embrace these easy home organization projects today and enjoy a refreshed living space that feels both functional and welcoming. Happy organizing!